3D Rendering: Bringing Buses on the Road to Life—From Concept to Realistic Visualization
What Is 3D Rendering of a Bus on the Road?
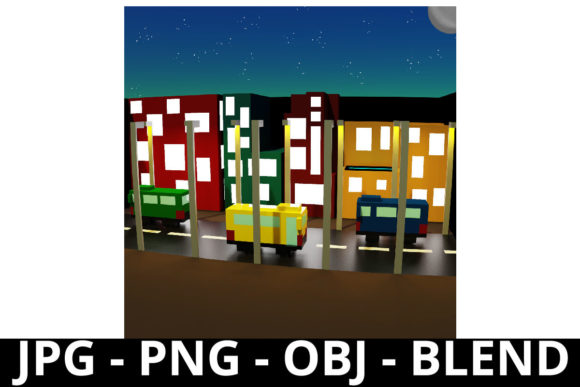
3D rendering is the digital process of generating a two-dimensional image or animation from a three-dimensional scene. When applied to a bus on the road, it involves modeling a realistic bus—complete with accurate dimensions, materials, lighting, and surroundings—and placing it within a dynamic, lifelike environment: asphalt lanes, roadside signage, passing vehicles, weather effects, and ambient lighting that shifts with time of day.
This isn’t just “drawing a bus”—it’s computational visualization grounded in geometry, physics-based lighting (like global illumination), texture mapping, camera simulation, and real-world spatial context. The result? A photorealistic or stylized image—or even an interactive 360° walkthrough—that feels as though you’re standing at the curb watching that very bus roll by.
Why Does It Matter? Purpose and Real-World Significance
At first glance, rendering a bus on the road may seem like a niche artistic exercise. In reality, it serves vital functions across industries:
- Transportation planning: City engineers use rendered bus-in-context visuals to assess how new transit routes integrate with existing infrastructure—how a double-decker bus fits under bridges, navigates tight corners, or impacts pedestrian sightlines.
- Public engagement: Municipalities share high-fidelity renderings of proposed electric bus fleets on neighborhood streets to gather community feedback—making abstract policy decisions tangible and relatable.
- Automotive design & marketing: Manufacturers create immersive campaign assets—think a sleek, zero-emission bus gliding past urban landmarks at golden hour—to showcase innovation before physical prototypes exist.
- Educational simulation: Driving schools and transit agencies use rendered environments for VR-based training, helping drivers practice lane discipline, blind-spot awareness, and emergency response in safe, repeatable scenarios.
In short, 3D rendering transforms data into experience—bridging the gap between technical specification and human perception.
How It Works: A Simplified Breakdown
Creating a convincing bus on the road rendering involves several coordinated stages:
- 3D Modeling: Artists or CAD specialists build a precise digital replica of the bus—down to rivet spacing, window curvature, and door mechanics—often using manufacturer blueprints or laser scans.
- Texturing & Materials: Surfaces are assigned realistic properties: matte aluminum body panels, reflective glass, rubberized tire treads, and even subtle grime or rain streaks. Physically Based Rendering (PBR) workflows ensure materials react authentically to light.
- Scene Assembly: The bus is placed in a detailed 3D environment—road geometry with lane markings, sidewalks, trees, traffic lights, and surrounding buildings—often sourced from GIS data or photogrammetry.
- Lighting & Camera Setup: Virtual sun position, sky models (e.g., HDRI environments), and artificial lights (streetlamps, headlights) are configured to match real-world conditions. Camera angles mimic human vision—avoiding distortion unless intentionally cinematic.
- Rendering & Post-Processing: Powerful software (like V-Ray, Unreal Engine, or Blender Cycles) calculates light bounces, shadows, reflections, and depth of field. Final touches—color grading, lens flares, motion blur—are added in compositing tools.
The entire pipeline balances artistic judgment with technical fidelity. A slight misalignment in wheel camber or inaccurate asphalt roughness can break immersion—even if viewers can’t name why.
Common Misconceptions—Clarified
Many assume that photorealism equals accuracy—but that’s not always true. Here’s what often gets misunderstood:
- “More polygons = better quality”: Not necessarily. A highly subdivided mesh without proper topology can cause shading errors. Clean, optimized geometry paired with smart displacement maps often yields superior results.
- “Real-time engines can’t match offline renders”: While traditional CPU-based renderers still lead in ultra-high-fidelity stills, modern GPU-accelerated engines like Unreal Engine 5 deliver near-photorealistic interactivity—ideal for virtual showrooms or live city dashboards.
- “It’s all about looks”: Contextual accuracy matters more than gloss. A beautifully rendered bus floating above the road surface, casting no shadow, or ignoring traffic flow rules undermines credibility—even if textures look perfect.
True effectiveness lies in contextual truth: scale, physics, behavior, and environmental responsiveness—not just visual polish.
Everyday Relevance: Beyond the Studio
You interact with bus-on-the-road renderings more often than you think:
- Your city’s transit app may use simplified 3D bus icons animated along real-time GPS paths—derived from the same foundational modeling principles.
- When you watch a news segment about a new electric bus pilot program, the background footage is frequently a hybrid: real street footage overlaid with a rendered bus to protect privacy or depict future deployment.
- Students learning urban design use free, open-source rendering tools to test how adding dedicated bus lanes affects traffic flow—simulating outcomes before breaking ground.
Even ride-hailing platforms leverage similar rendering logic when estimating pickup visibility—modeling how a bus’s height and color affect driver recognition at intersections.
Technology’s Evolving Role
Advancements are accelerating accessibility and realism:
- AI-assisted texturing: Tools like NVIDIA Canvas turn simple brushstrokes into detailed road surfaces, complete with cracks, oil stains, and wet-weather reflectivity—cutting manual work by up to 70%.
- Procedural environments: Software like World Machine or Houdini generates entire city blocks—including variable road widths, sidewalk slopes, and seasonal foliage—ensuring every bus rendering sits in a coherent, scalable world.
- Cloud rendering farms: Complex scenes that once took days locally now render in hours via distributed GPU networks—enabling rapid iteration for public consultations or stakeholder reviews.
These innovations don’t replace human expertise—they empower designers, planners, and educators to focus on meaningful decisions, not technical bottlenecks.
Getting Started: Tips for Beginners
If you're curious about creating your own bus on the road visualization:
- Start simple: Use free tools like Blender and download a CC0-licensed bus model from Poly Haven or Sketchfab.
- Master lighting first: Try rendering the same bus at dawn, noon, and dusk using a single HDRI sky—observe how shadow length and color temperature change perception.
- Observe real life: Take photos of buses in varied conditions—rainy pavement, crowded downtown stops, rural highways. Note how light wraps around curves, how tires compress slightly, how side mirrors catch peripheral detail.
- Validate scale: Always include a human figure or standard object (like a fire hydrant or traffic cone) in your scene. Our brains instantly detect incorrect proportions.
Remember: great 3D rendering isn’t about complexity—it’s about intentional communication.
Final Thought: More Than Pixels—A Tool for Clarity
A 3D-rendered bus on the road is never just a picture. It’s a translation layer—converting engineering specs into civic dialogue, transforming sustainability goals into visceral understanding, and turning abstract mobility concepts into shared mental models. Whether you’re evaluating a new transit corridor, designing an inclusive bus stop, or simply wondering how that bright-blue electric bus fits into your neighborhood’s rhythm—rendering helps you see not just *what*, but *why* and *how it belongs*.
As cities grow smarter and transportation evolves faster, the ability to visualize change—accurately, accessibly, and empathetically—won’t be a luxury. It will be essential.