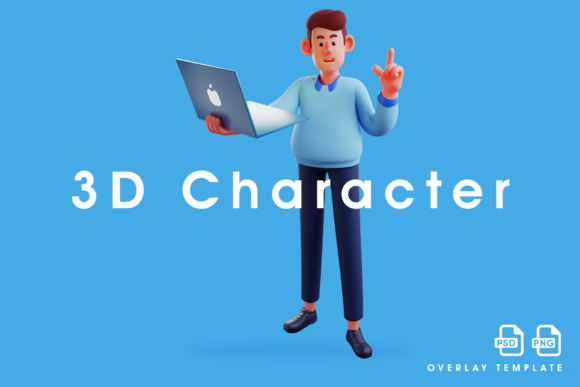
3D Realistic Vector Illustration
If you’ve ever seen a product mockup that looks like it could roll off a factory line—or a logo that seems to catch light and cast subtle shadows—you’ve likely encountered 3d realistic vector illustration. It’s not just “3D” and “vector” mashed together. It’s a deliberate fusion: the precision, scalability, and editability of vector graphics layered with depth cues, lighting, material textures, and perspective that mimic real-world physics. People turn to it for branding that stands out, marketing assets that convert, educational visuals that clarify complexity, and product presentations that build trust—without needing photorealistic renders or heavy 3D software.
Why “Realistic” Doesn’t Mean “Photographic”
A common starting point—and misstep—is assuming that “realistic” means chasing pixel-perfect photography. That’s not the goal. A well-executed 3d realistic vector illustration retains clean edges, crisp typography integration, and smooth color transitions while suggesting volume, weight, and surface quality. Think of a sleek Bluetooth speaker rendered in vectors: metallic sheen, soft ambient occlusion under its curve, and a slight shadow—all scalable to billboard size without blur or pixelation. This balance is why designers use it for responsive web banners, print-ready packaging, and animated social posts alike.
Mistake #1: Ignoring File Compatibility and Export Options
Many users download or purchase a 3d realistic vector illustration only to discover it opens as a flattened raster file—or worse, a proprietary format locked inside one app. Vector files should ideally be delivered as native .ai, .eps, or .svg, with layers preserved and editable paths intact. If you’re using it in Canva or Figma, check whether the SVG retains strokes, gradients, and grouping—or if it’s been rasterized on export. A $29 asset loses value fast if you can’t recolor the base shape or adjust the lighting angle.
Better approach: Before downloading or buying, verify the file specs in the description—not just the preview image. Look for phrases like “fully layered,” “editable gradients,” or “CMYK + RGB versions included.” Test a free sample (if offered) in your actual workflow: import it into your design tool, try changing one fill color, and zoom in to confirm no blurriness appears at 400%.
Mistake #2: Overlooking Lighting Consistency Across a Set
When assembling multiple 3d realistic vector illustrations—for example, icons for an app dashboard or product variants for an e-commerce site—it’s easy to assume “they all look 3D” means they’ll harmonize. But inconsistent light direction (e.g., one icon lit from the top-left, another from the bottom-right), mismatched shadow intensity, or varying gloss levels break visual cohesion. The result? A disjointed interface that feels amateurish, even if each element is technically polished.
Better approach: Choose collections built around a unified lighting system. Reputable creators often name this explicitly—like “Studio Light Pack” or “Isometric Consistency Bundle.” If mixing sources, use one base illustration as your reference: note its highlight position, shadow angle, and ambient light ratio, then manually adjust others to match using your vector editor’s gradient mesh or opacity masks.
Mistake #3: Assuming All “3D” Vectors Are Print-Ready
Some 3d realistic vector illustrations rely heavily on transparency effects, complex blends, or raster-based textures (like PNG overlays embedded in an SVG). These may display perfectly on screen but fail during RIP (raster image processing) in professional printing—causing unexpected flattening, color shifts, or missing elements. A vibrant gradient mesh on a coffee cup might look stunning online but separate unpredictably on a spot-color label press.
Better approach: For print projects, request or generate a version with expanded appearances: outline strokes, flatten transparency where safe, and convert gradients to mesh-free alternatives (e.g., stepped color bands) if needed. Run a preflight check in Adobe Acrobat or your printer’s preferred tool. When in doubt, ask your print provider which vector features they support—and stick to those.
Mistake #4: Skipping Contextual Testing Early
It’s tempting to drop a 3d realistic vector illustration into your layout and call it done. But does that glossy smartphone mockup still read clearly over a busy background image? Does the isometric office chair maintain legibility at 24px in a mobile menu? Does the metallic badge clash with your brand’s primary palette when placed beside a photo?
Better approach: Test in context *before* finalizing. Place the illustration against your actual background colors, typography, and adjacent imagery—even in low-fidelity wireframes. Use browser dev tools to toggle contrast, simulate color blindness, or preview grayscale. If it vanishes or competes visually, simplify: reduce specular highlights, increase outline contrast, or switch to a flatter shading style.
What to Check Before You Commit
- Scalability proof: Zoom to 800% in your vector editor—do edges stay razor-sharp, or do gradients show banding or aliasing?
- Editing flexibility: Can you select and modify individual components (e.g., change just the lens reflection on a camera icon)?
- Licensing clarity: Does the license cover your use case—commercial websites, SaaS dashboards, merchandise, or client work?
- Style longevity: Does it lean heavily on fleeting trends (e.g., hyper-glossy “glass morphism” textures) or prioritize timeless clarity and function?
- Creator credibility: Are samples shown across real projects—not just isolated hero shots? Do they explain their process or limitations openly?
Start Small, Scale With Confidence
You don’t need a full 3D suite to benefit from 3d realistic vector illustration. Many designers begin by adapting pre-made assets—then gradually learn to build basic extrusions, bevels, and lighting in Illustrator or Affinity Designer. The key is aligning technique with intent: use depth to guide attention, not distract; apply texture to suggest function (e.g., rubber grip on a tool handle), not just ornament; and always serve the message before the medium.
Whether you’re illustrating a course module, launching a Shopify store, or refining a pitch deck, 3d realistic vector illustration works best when it feels intentional—not engineered to impress, but designed to communicate clearly, scale reliably, and adapt gracefully across every touchpoint your audience encounters.